
Creating a Centralized Network System having RDS and IIS, using Windows Server


Creating a centralized private network system with Remote Desktop Services (RDS) and Internet Information Services (IIS) using Windows Server is a valuable solution for organizations looking to provide secure remote access to applications and web services while maintaining control over their network. This setup is particularly beneficial for businesses that need to keep their resources within a private network for security or compliance reasons. Here's a step-by-step guide on how to set up such a system:
Configuring your systems:
The first and foremost thing is the installation of a Windows server on your system or a virtual machine. Here I have installed Windows Server 19 on two virtual machines.
You will need two or three of these VMs with a Windows Server installed on them. It's better if you go with three Servers because Keeping different services and resources on separate servers within a network has several benefits, primarily related to security, performance, manageability, and scalability. This practice is known as server specialization or server segregation.
Next, we will configure the following roles and services :
Active Directory Domain Service(ADDS)
DNS Configuration
RDS
Internet Information Services (IIS)
DHCP Configuration
Active Directory Domain Service Configuration:
The role of ADDS is to manage and organize network resources, including users, computers, groups, and other objects, within a Windows-based network environment. AD DS provides centralized authentication, authorization, and configuration for network resources, making it easier to manage users and devices in a domain-based network.
On Server 1:
Step 1: Install AD DS and promote the server to a domain controller.
Note: Here DNS will automatically install with AD DS. (Check this link for detailed steps of installing and configuring ADDS)
Step 2: Assigning a static IP address to the Server.
Assigning a static IP address to a server that hosts Active Directory Domain Services (AD DS) is a good practice to ensure stability and consistent network communication within your domain environment. Here's how you can set a static IP address on a Windows Server:
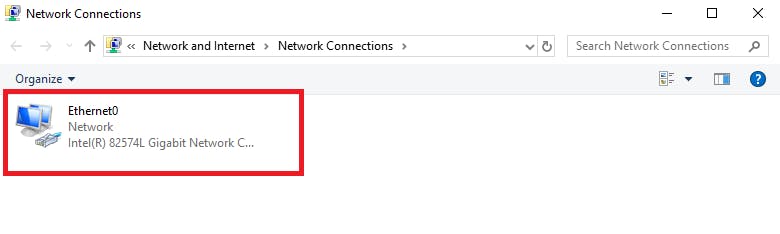
1. Open Network Connections:
- Press
Win + Xon your keyboard and select "Network Connections" from the menu. This will open the "Network Connections" window.
2. Identify the Network Adapter:
Locate the network adapter that you want to configure with a static IP address. It's usually named "Ethernet" or "Local Area Connection."
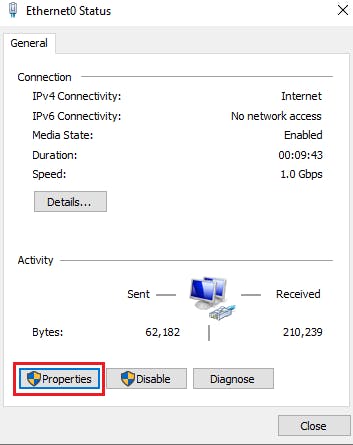
3. Access the Adapter's Properties:
Right-click on the network adapter and select "Properties" from the context menu.
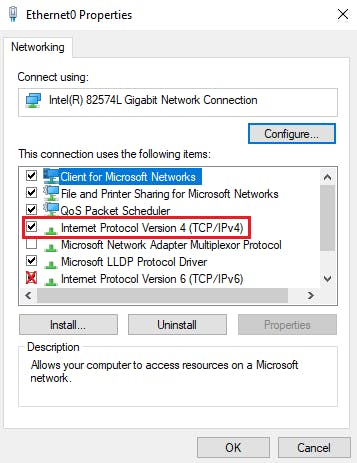
4. Configure IPv4 Settings:
In the properties window, scroll down and you'll see "Internet Protocol Version 4 (TCP/IPv4)" and (TCP/IPv6) in the list of items. Make sure to uncheck (TCP/IPv6) and Select (TCP/IPv4) and click on the "Properties" button.
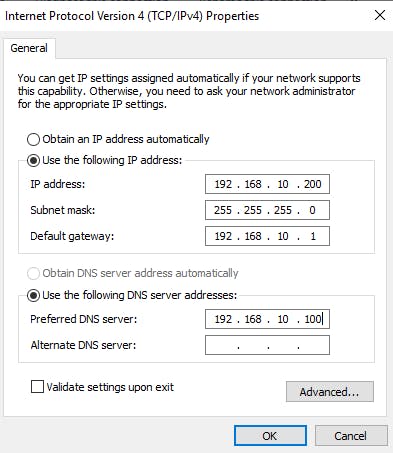
5. Set a Static IP Address:
In the "Internet Protocol Version 4 (TCP/IPv4) Properties" window, choose the option "Use the following IP address."
Enter the static IP address you want to assign to the server. This should be within the same subnet as your network. You'll also need to specify the subnet mask, default gateway, and DNS server(s) manually.
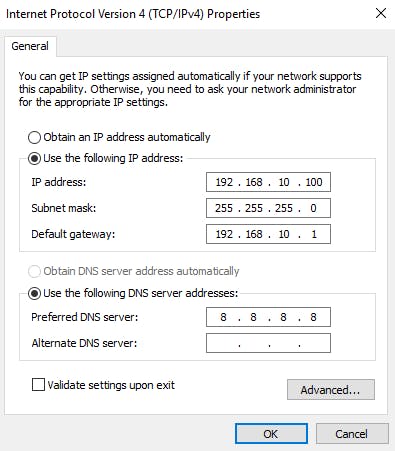
Note: Setting DNS to use 8.8.8.8 as the DNS server means you are configuring your server to use Google's public DNS server for DNS resolution. While Google's DNS service is reliable and widely used, it's important to note that in a Windows Active Directory environment, it's generally recommended to use your own DNS servers (which are typically your domain controllers running DNS) to ensure proper functionality and Active Directory integration.
7. Validate and Apply Settings:
Double-check the IP settings you've entered to ensure they are accurate.
Click "OK" to close the "Internet Protocol Version 4 (TCP/IPv4) Properties" window.
Click "Close" to close the network adapter's properties window.
DNS Configuration:
(DNS) Domain Name System is a fundamental protocol used on the internet and local networks to translate human-readable domain names into IP addresses that computers and devices use to communicate. It's essentially a system for naming and addressing network resources.
On Server 1:
Step 1: Configure DNS Zones.
Note: DNS is already installed with AD DS.
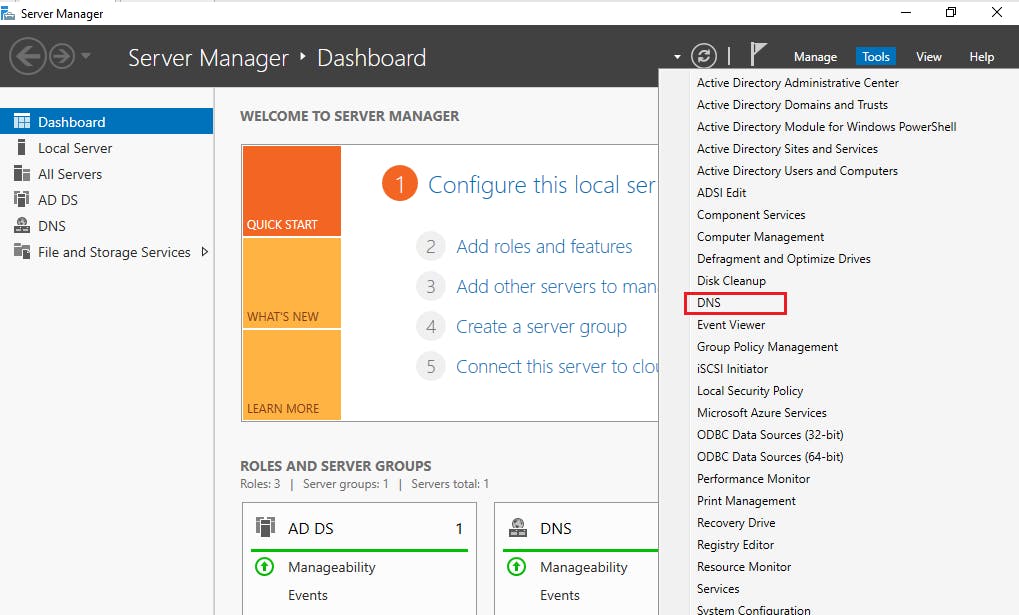
- Open the "DNS Manager" by clicking on "Tools" in the Server Manager and selecting "DNS ".
In the DNS Manager, expand the server node to reveal the "Forward Lookup Zones" and "Reverse Lookup Zones" folders.
Configure Reverse Lookup Zone: This zone is used to resolve IP addresses to hostnames.
- Right-click on "Reverse Lookup Zones" and choose "New Zone."
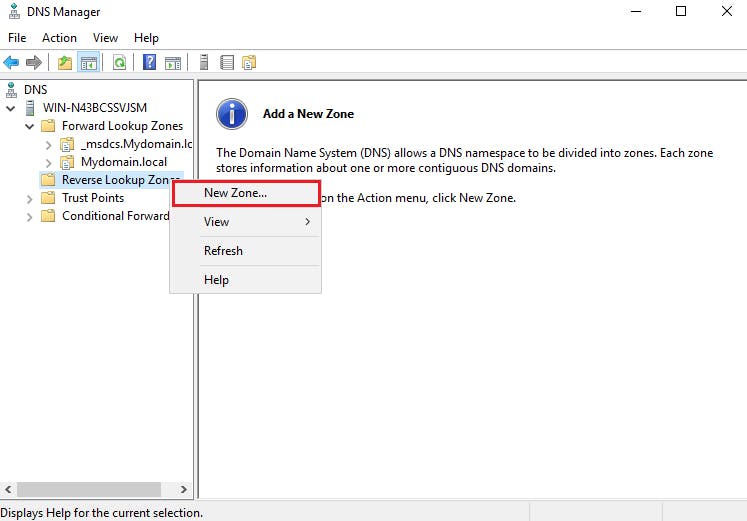
Follow the wizard to create a primary zone for IPv4 or IPv6 reverse lookup, depending on your network configuration.
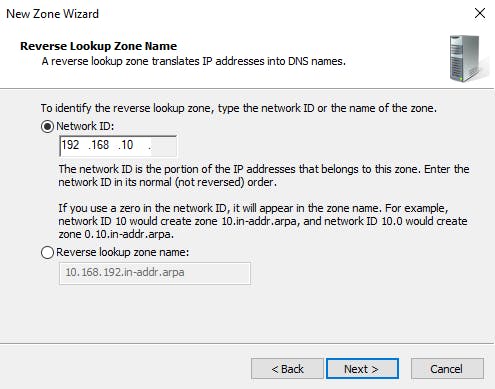
Specify the network ID and subnet mask for the reverse lookup zone, click next and your reverse lookup zone is done.
Setting Up Remote Desktop Services (RDS):
Now if you want your client's machines to get remote access to applications and desktops for users you can install and set up RDS. RDS enables users to connect to a centralized server where they can run applications or access a full desktop environment.
On server2:
Step 1: Assigning a static IP address to the Server:
In the "Internet Protocol Version 4 (TCP/IPv4) Properties" window, choose the option "Use the following IP address." Just like we did earlier.
Enter the static IP address you want to assign to the server. This should be within the same subnet as your network. You'll also need to specify the subnet mask, default gateway, and DNS server(s) manually.
Note: Here give the IP address of your Domain in the DNS.
Step 2: Domain Join:
The next step is joining a server to an existing domain controlled by a Domain Controller. (Click on this link to learn how to make your server2 a member of your server's domain controller)
Step 3: Installing RDS:
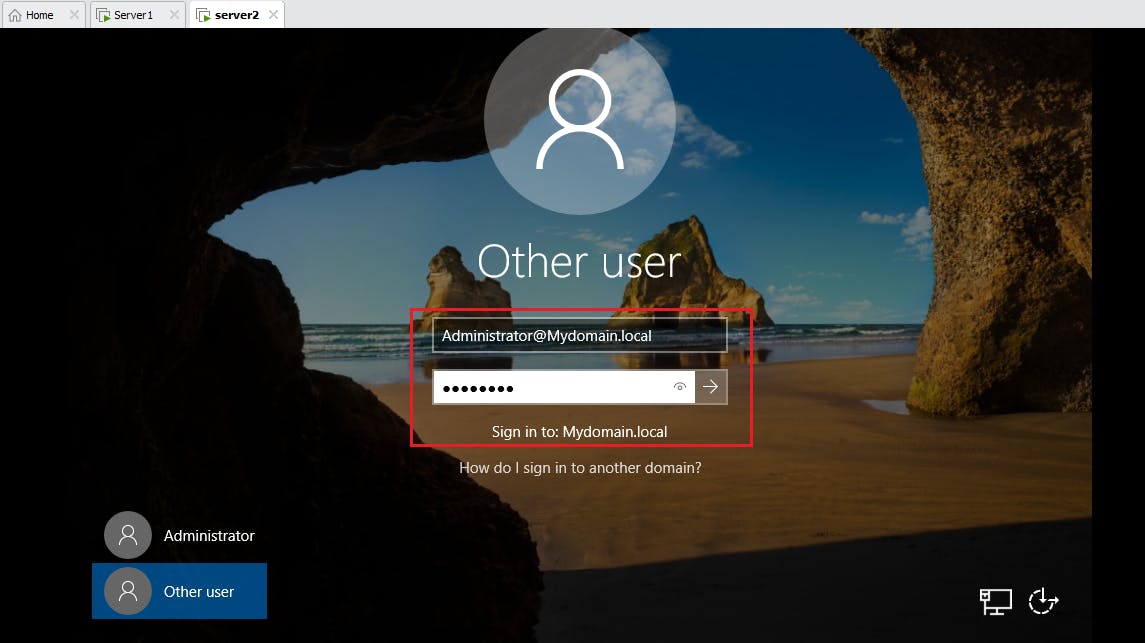
After domain join, your computer will restart so you log in with the administrator details of your domain controller :
After logging in now we will begin installing RDS:
RDS installation:
Step1 :
In Server Manager, click on "Manage" in the top right corner.
Select "Add Roles and Features."
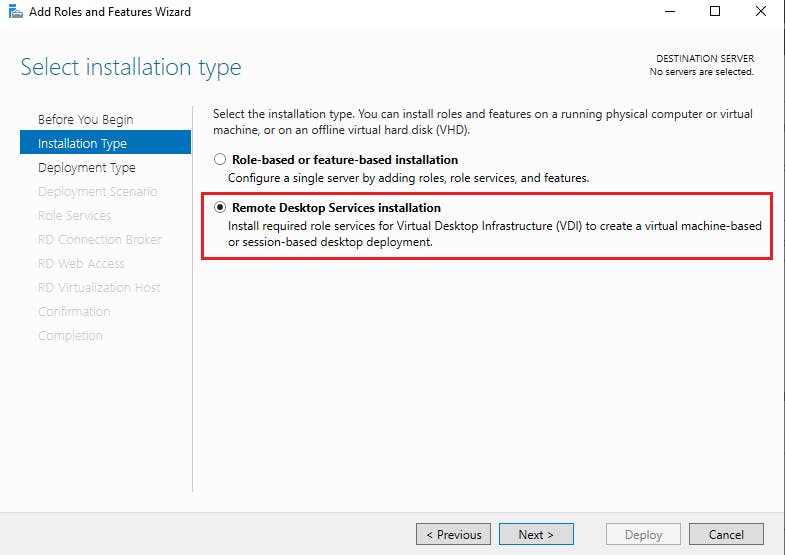
Step2:
- Select the installation type as: "Remote Desktop Service installation"
Step3:
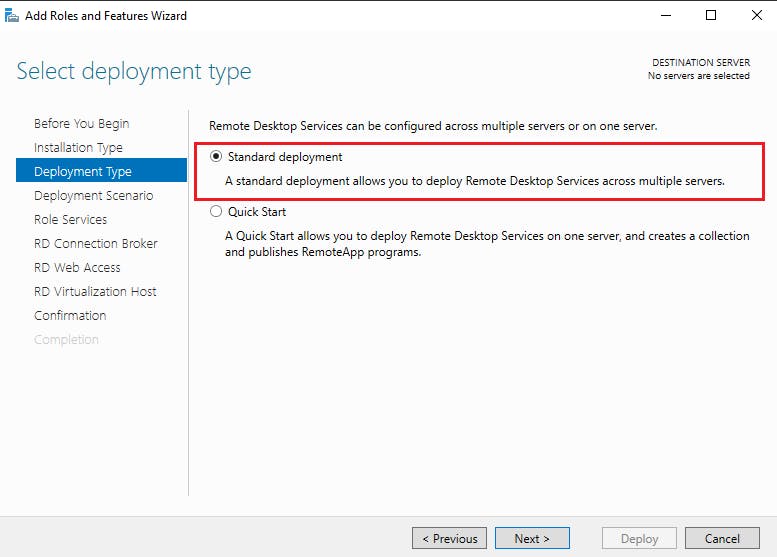
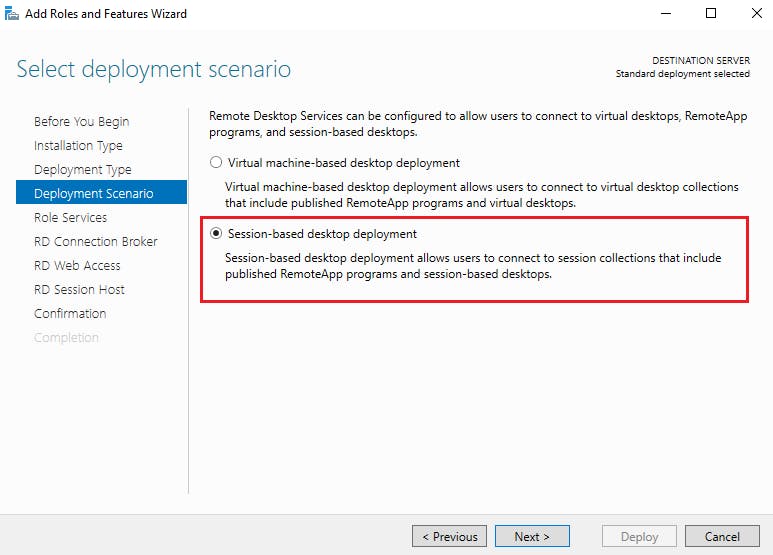
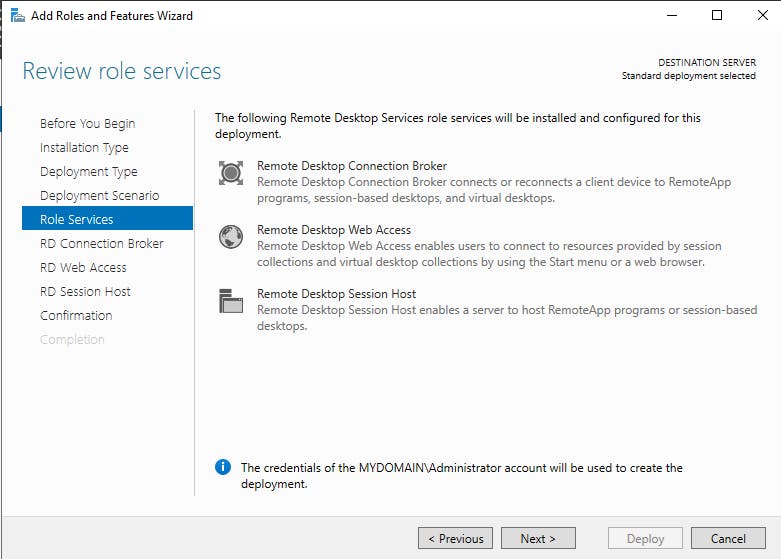
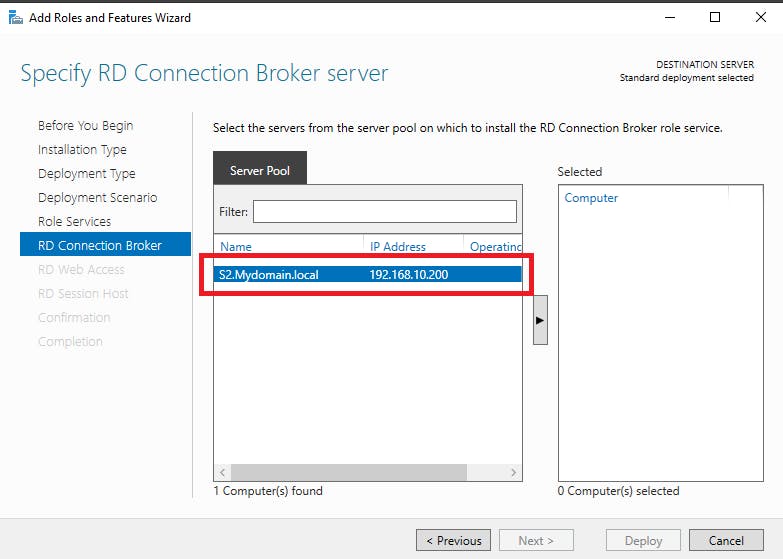
Next, choose the same server for both RD Web Access and RD session Host.
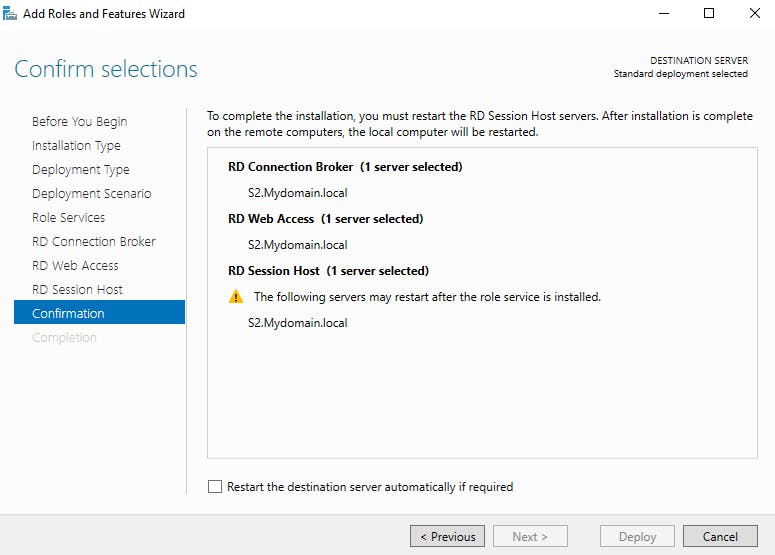
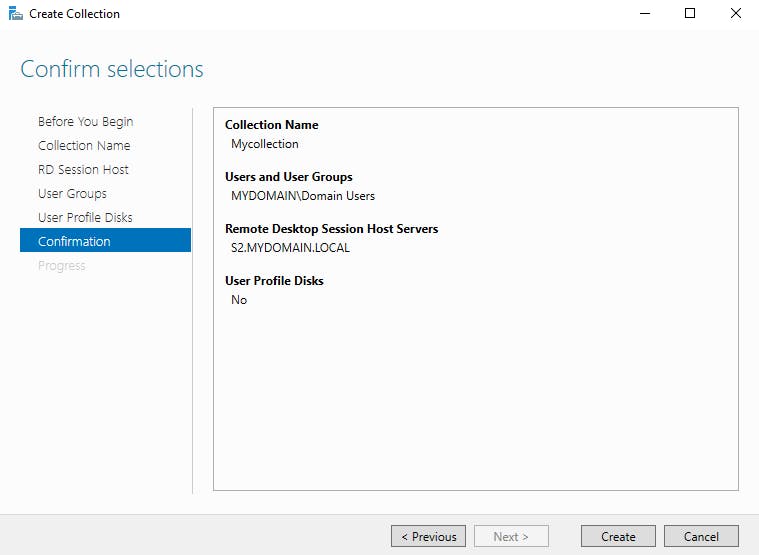
At last, confirm your selections and your system will restart, to complete the installation.
Once the installation of roles is completed go to Server Manager.
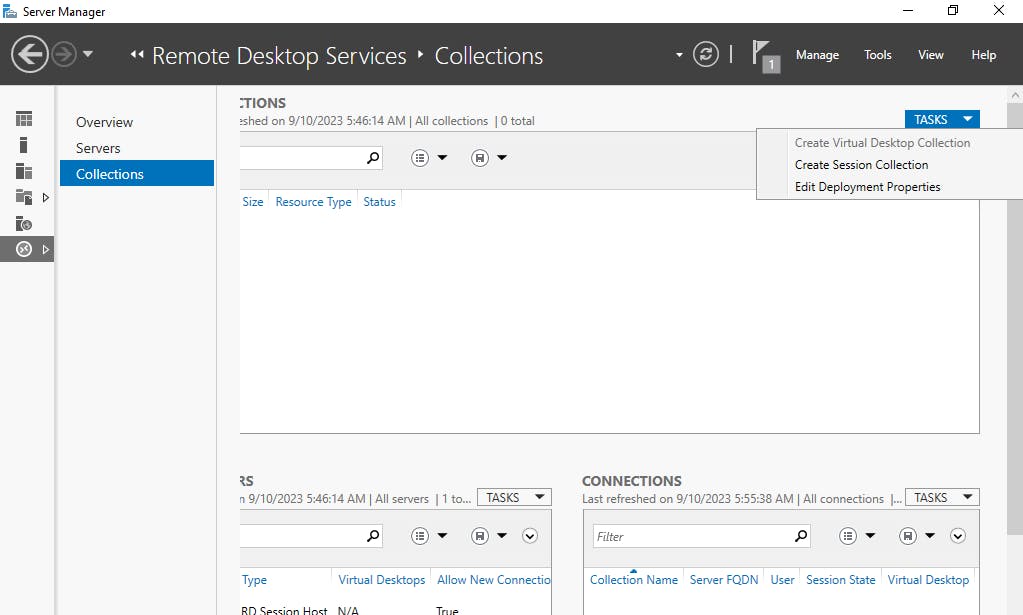
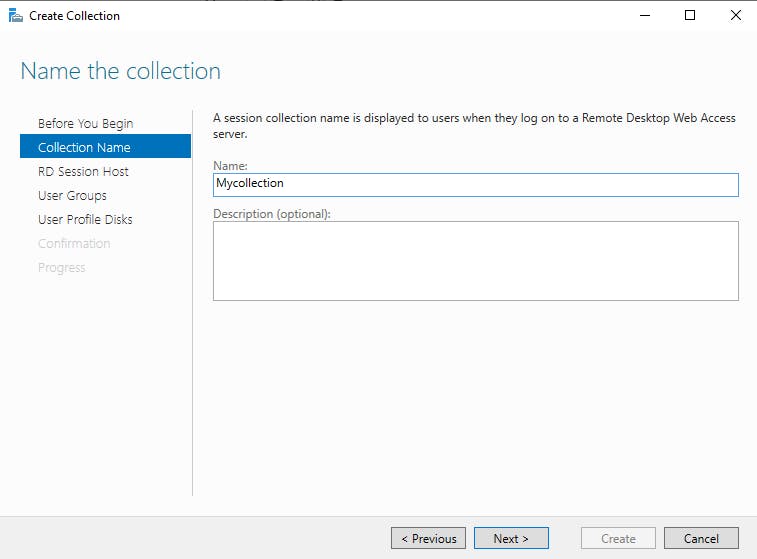
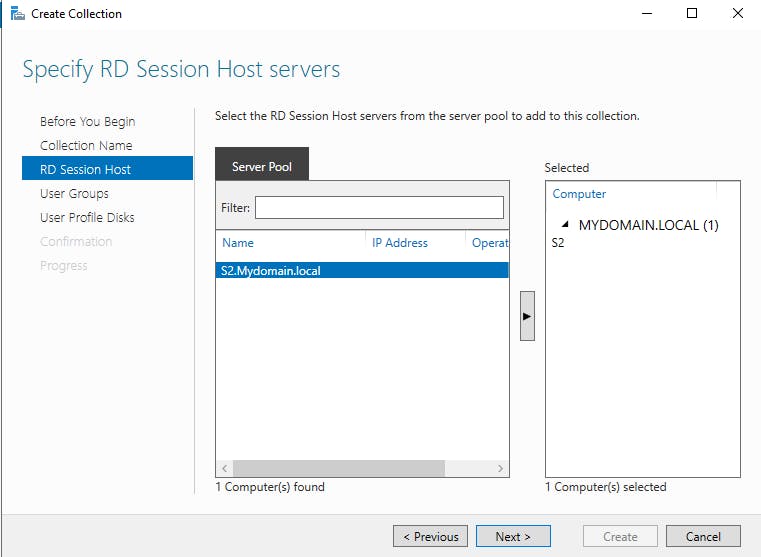
Navigate to "Remote Desktop Services" and select "Collections."
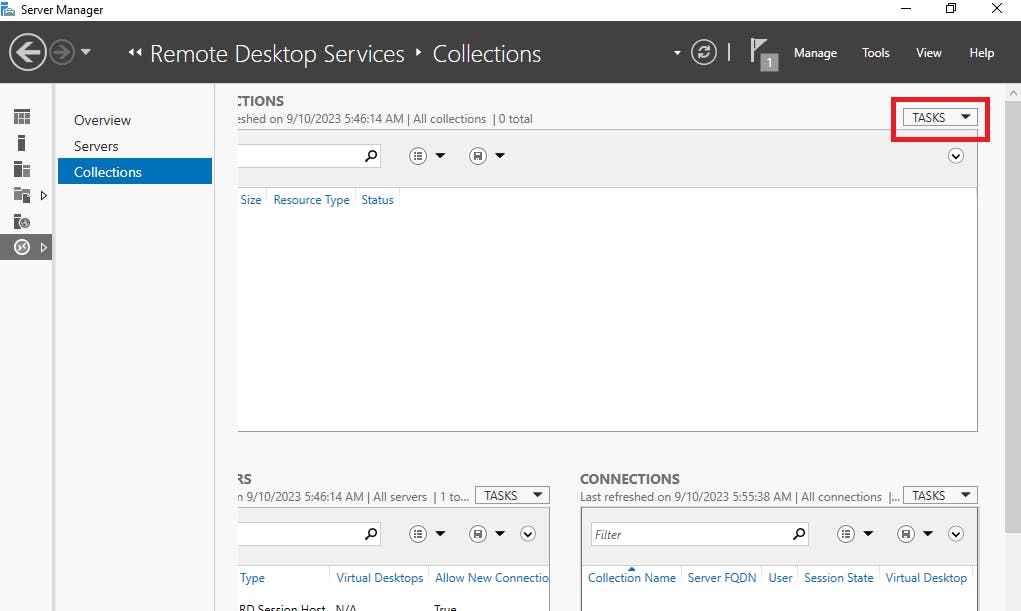
Go to tasks and create a new session collection and configure session settings.
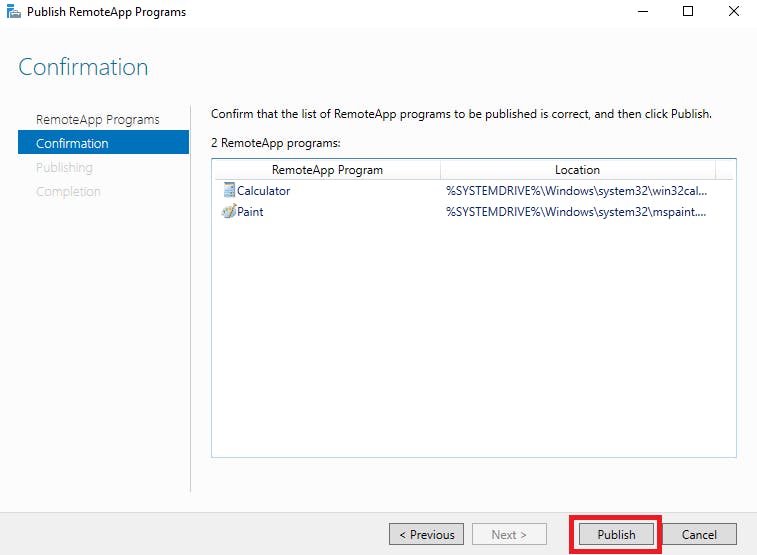
After creating collection, Publish your apps by clicking on the option below :
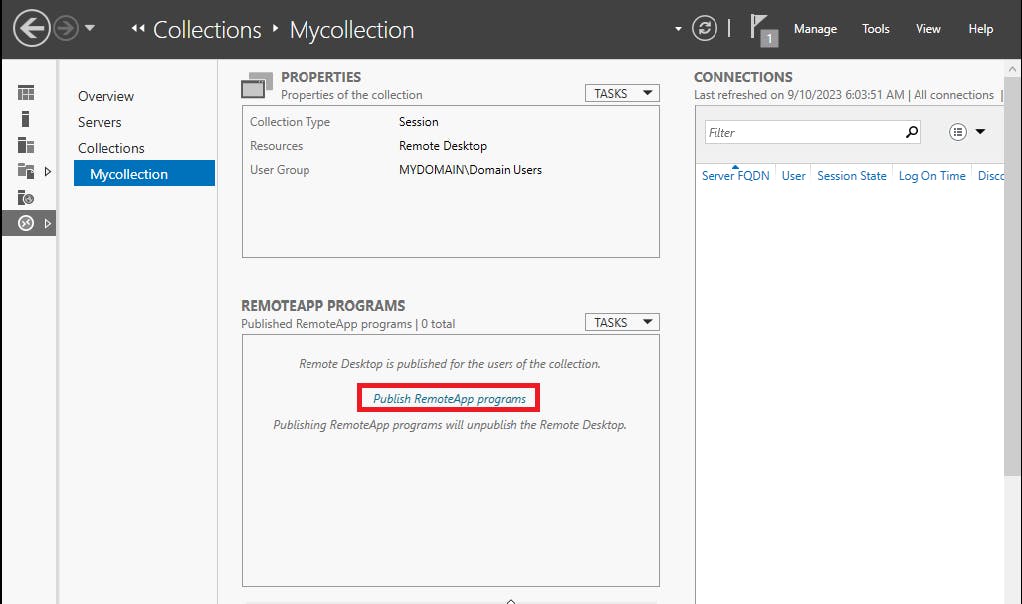
Select the Apps you want to publish and click Add.
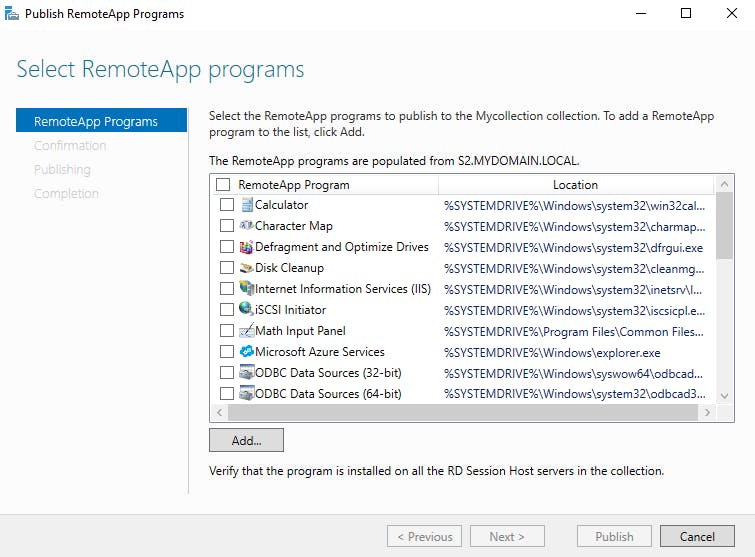
Next, Click Publish and your apps will be published and then you'll be able to access these applications remotely.
Now how to access these published apps ?
Step 1: Open a web browser and navigate to the RD Web Access URL provided by your administrator which will include the fully qualified name of the RDS domain name. e.g: ComputerName.DomainName/rdweb. In our case it's: s2.mydomain.local/RDWeb.
And you'll get something like this on your browser:
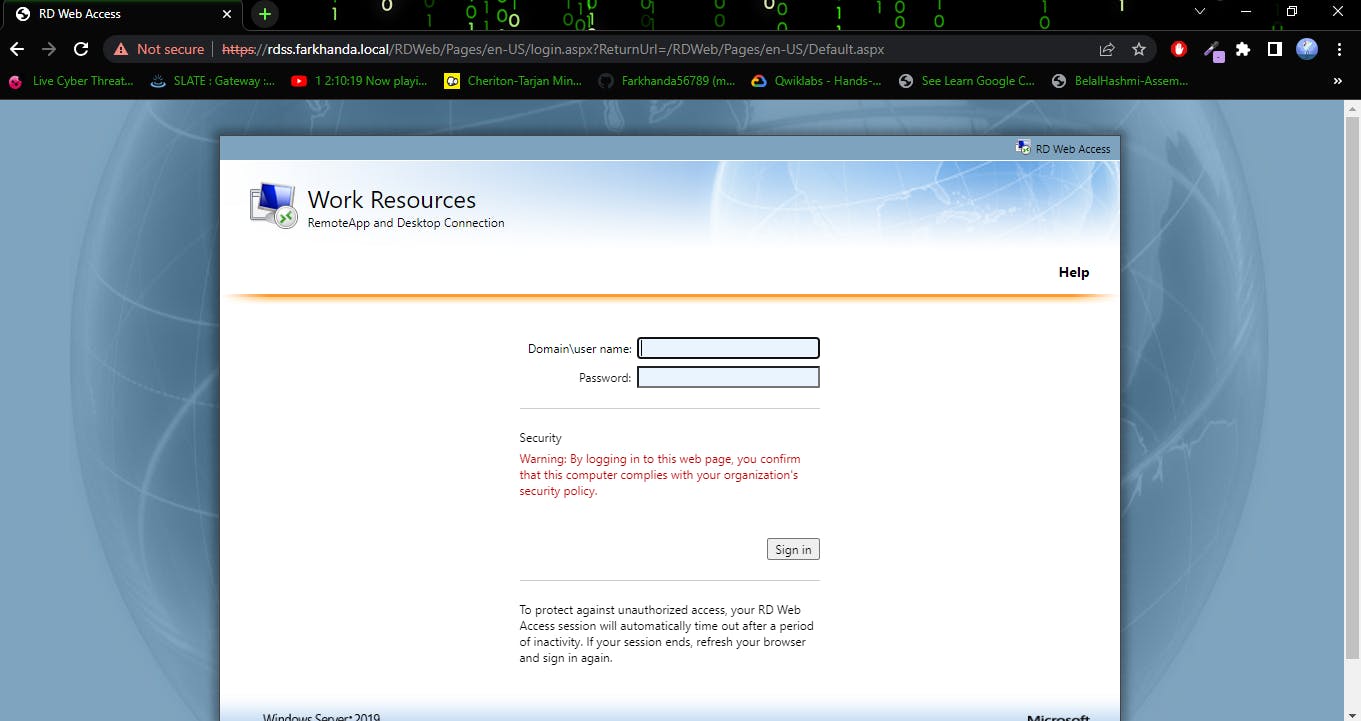
You can make users on your Domain Controller Server and use those credentials here to log in and access these remotely published apps.
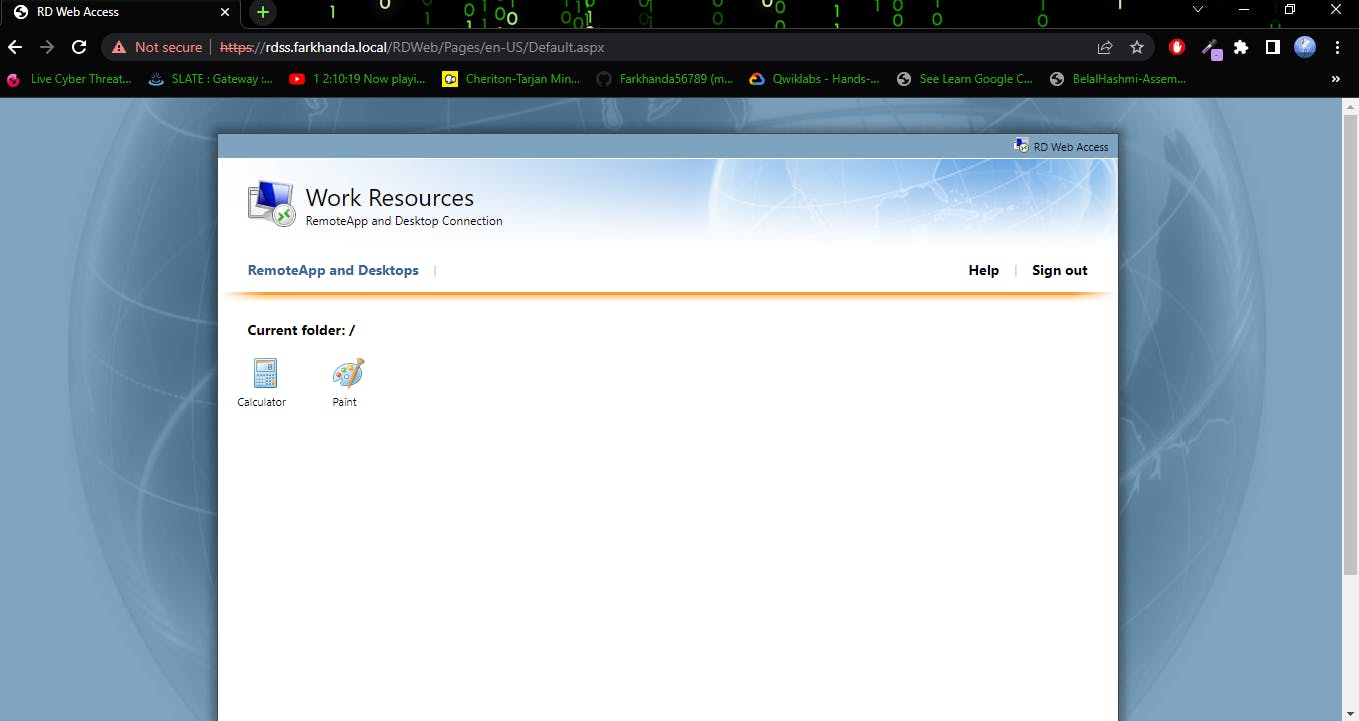
This is what it looks like, once you get in :
Ps: Now we can see and use our published apps.
DHCP Configuration:
On Server 1:
Install and Configure DHCP scopes, IP address ranges, subnet masks, gateways, etc. (Check this link for detailed steps)
Dynamic Host Configuration Protocol (DHCP) is a network protocol that dynamically assigns IP addresses from a predefined pool of available addresses to devices that request them. This allows for efficient use of IP addresses, especially in networks with a large number of devices.
Configuring Internet Information Services (IIS):
On server2 or server3:
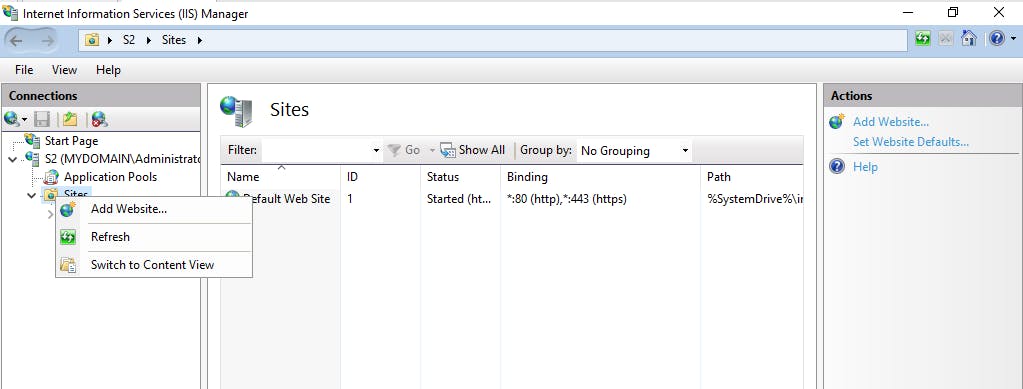
Open Internet Information Services (IIS) Manager:
You can access IIS Manager through Server Manager or by searching for "IIS Manager" in the Start menu.

- Alternatively, use the "inetmgr" command in the Run dialog.
Navigate to Sites:
In IIS Manager, expand the server node in the Connections pane.
Click on "Sites" to view the list of websites.
Default Website:
- By default, IIS creates a "Default Web Site." You can use this site or create a new one based on your needs.

Basic Configuration:
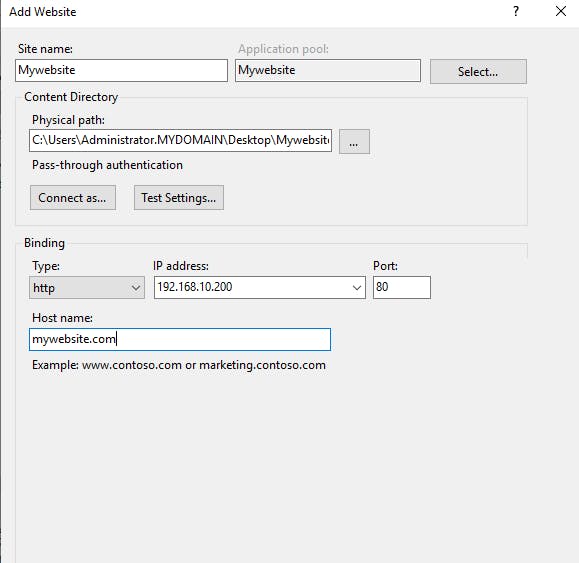
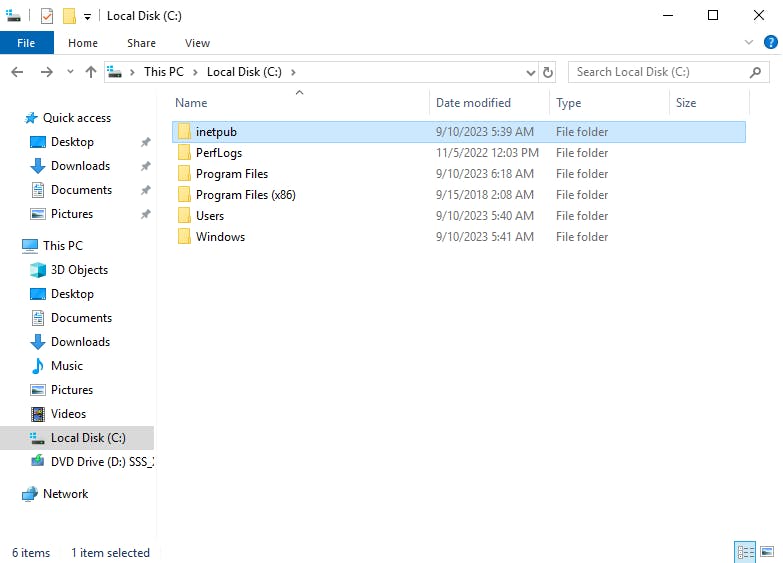
Now put the files of your website in this path if you are going with the default website.

Now search that ip address you added earlier on browser and there it is your website :